Get Pedi Ready for Spring

Hi Loves,

Spring is just around the corner, which means it’s time to say goodbye boots and hello sandals! But before you show off your toes, you probably need to get them ready for their debut. We all know the cost of professional pedicures can add up quickly which is why I am going to give you a few essential pedicure tips so you can give yourself a salon-perfect pedi at home.

Here is my 1 through 9 step-by-step guide that will get your feet ready for all the open-toe shoes spring and summer has to offer:

Step 1: Soak

Fill your bathtub with warm water and add a bath salt that will help you relax while you soak your feet for 10 to 15 minutes or until your feet have softened for easy removal of dry skin. I recommend Heel to Toe Peppermint Pedicure Salt which can be purchased at Sally Beauty for $3.99 which helps to soothe and relax tired feet and it’s infused with peppermint for aromatherapy which will help you relax.

Heel to Toe

Step 2: Clip

After soaking your feet, you can start clipping your toenails. When clipping your toenails make sure you cut them evenly and equally, angling your clippers in the same direction. For clipping your toenails, I recommend Heel to Toe Sure Grip Toenail Clipper which can be purchased from Sally Beauty as well for $3.29.

toe

Step 3: File and Buff

Before you start to file, dry off your toenails. Position the file under your nail and file gently with even strokes, never going back and worth as this can damage your nails. I recommend Les Mirages Antibacterial Nail File which helps provide protection against germs.

File

Don’t forget to buff! Lightly buff nails in a back and forth motion with a finishing block. This will help prep your nails for nail polish. I recommend the All Season Fine Grit Finishing Block because it has a light abrasive for natural nails.

Buff

Step 4: Exfoliate

Wear exfoliating gloves and apply a polishing foot scrub to your feet and massage in a circular motion to get rid of any flaky or dry skin. Any exfoliating gloves and polishing scrub will work just fine. I recommend Bath Secrets Exfoliating Gloves and Heel to Toe Exfoliating Polishing Foot Scrub.

GlovesFoot Scrub

Step 5: Apply Callus Remover

Even if you don’t have callused feet, you want to apply a callus remover to the areas of your feet that are still a little rough before using a pumice tool. I like to apply the remover just before I start nipping my cuticles so the remover stays on my feet a minute. I highly recommend Be Natural Callus Eliminator by American International. This product is amazing and will make your feet baby smooth with little work involved. The directions say to leave it on for 3-5 minutes, but I leave it on for no more than one minute because my feet are not callused, just a little dry in some areas. If you have callused feet, then I would follow the 3-5 minute rule on the directions depending on the severity of your callus.

Foot care

Step 6: Cuticles

Massage cuticle remover into your nail beds to loosen your cuticles. I recommend Be Natural Cuticle Eliminator.

Cuticle

After letting the cuticle remover sit for a few seconds, it is now time to push them back before nipping. I recommend the Cricket Cuticle Pusher. Make sure to hold the pusher at a slight angle and gently push toward the nail base.

Pusher

Now it is time to start nipping away! I recommend All Season Cuticle Nipper to safely trim away your cuticles.

Nipper

Lastly with your cuticles, apply cuticle oil. I recommend Orly Argan Oil Cuticle Drops which helps nourish and hydrate cuticles and nails.

Argan drops

Step 7: Pumice Away

Wipe off the callus remover and start massaging your feet with a pumice stone to make them silky-smooth. I highly recommend the Tweezerman Pedro Callus Stone or the Mr. Pumice Extra-Coarse Purple Pumi Bar. Both products are amazing and give you the outcome of a professional pedicure. LOVE them!

Pumice 1Pumice

Step 8: Moisturize

Apply a generous amount of moisturizer in a circular motion. I recommend Queen Helene Cocoa Butter Creme.

creme

Step 9: Color

Before you add color to your freshly pedicured toenails, be sure to remove the oil and moisturizer on your nails really well with nail polish remover.

Position a toe separator on each foot to make it easier to paint your toenails.

Spacers

Now you’re ready to apply your favorite nail polish. Apply a clear base coat, two even coats of colored polish (make sure the first is completely dry before applying the second coat), and lastly apply a quick dry top coat. For a clear base coat I recommend Orly Bonder and for a quick dry top coat I highly recommend Orly Sec ‘N Dry.

BonderSec n Dry

And that is how you give yourself a salon-perfect pedicure at home.

All the products mentioned in the blog post can be purchased at Sally Beauty and will last you at least a year, if not longer.

Your beauty addict,

Trisha

XO

ULTA Instant Bronze Sunless Tanning Mousse

Hi Loves, Happy Friday!

Yesterday I made a quick stop into my local Ulta and stumbled across their new self tanning line. Of course I had to try it out so I purchased Ulta’s Instant Bronze Sunless Tanning Mousse which only cost $12.99  for 8 fluid ounces of product (such a deal). If you like St. Tropez’s Self Tan Bronzing Mousse, you need to get Ulta’s self tanning mousse ASAP! The results are the same, if not better than St. Tropez’s self tanning mousse. And while you’re at Ulta picking up your amazing self tanning mousse, don’t forget the Ulta Sunless Mitt which is a must have to apply the self tanner. Ulta really did a great job making this product and the price tag just can’t be beat. You apply this self tanner just like the St. Tropez tanning mousse and if you’re unsure on how to apply the mousse for flawless results, click here for my review.

ULTA TANNERULTA Tnning Mitt

I am sure this product will be selling out quickly as it is truly amazing!

Have a fabulous weekend.

XOXO

Your Beauty Addict,

Trisha

September Beauty Favorites!!!

Hello Gorgeous!

It has been a long time since I have found new beauty products I absolutely adore which is why I am so excited to tell you my September beauty favorites!

– The first beauty product that takes the cake over all the others is BECCA Shimmering Skin Perfector SPF 25+ in Opal (golden opal pearl). You can use this product in many different ways such as a highlighter, makeup base/primer or highlighting the body. I use this for an all-over inner glow and mix a pump of Shimmering Skin Perfector with my favorite foundation and apply it to my entire face (You can also mix this into your moisturizer if you don’t wear foundation). The results are amazing! I never would have thought this product is something I would love, let alone use, but thanks to Sephora, I received a free deluxe sample to try and so can you! How? Just purchase $25 or more from Sephora.com and enter coupon code: OPAL at checkout to receive your free sample (while supplies last). After one week of using this amazing freebie, I ordered the full-size from Sephora.com for $41. A little bit goes a long way, so this will definitely last a long time. I highly recommend this product!

BECCA

Sephora Description:

What it is:
A sheer crème-liquid that perfects skin with light-reflecting pearls for a soft, natural glow.What it does:
Achieve a subtle luminosity. This formula features ultrafine light-reflecting pearls that melt into your skin for polished, natural-looking radiance. Water-light and sheer, it has a prismatic effect that allows it to adjust in any light, so your refined glow is never lost.What else you need to know:
This product has been dermatologically tested.

Suggested Usage:
-This product may be used on the face and body.
-To highlight the face, dab a small amount over foundation using your fingertips or brush to cheekbones, brow bones, temples, bridge of the nose, and cupid’s bow.
-When highlighting the body, apply to dècolletage, shoulders, and legs.
-Spotlighting: after applying makeup, dab a small amount, onto cheek and brow bones.
-For a luminescent base: before applying primer, use Shimmering Skin Perfector™ as a base over the entire face using fingertips or a brush. Follow with Radiant Skin Satin Finish Foundation and add a touch of Radiant Skin Creamy Concealer where needed.
-For an all-over inner glow: mix half a pump of Shimmering Skin Perfector with Radiant Skin Satin Finish Foundation or your favorite moisturizer and apply to the entire face.
-For a head-to-toe glow: mix two to three pumps with your favorite body moisturizer.
– The second product in my September beauty favorites is TARTE Maracuja Creaseless Concealer in Light. A few weeks ago I was given a free TARTE makeover at Ulta and the makeup artist used this concealer on me and I have been hooked ever since. It really made my eyes pop without any eyeshadow and I now use it daily. It stays in place all day and doesn’t crease of settle in fine lines. It has become my holy grail makeup product. It is $24, but a little bit goes a long way and you get .28oz in the tube which is a pretty good amount. I LOVE it!
Concealer
Sephora Description:
What it is:
A full-coverage concealer that won’t crease, flake, or leave you needing more.

What it does:
Tarte’s Maracuja Creaseless Concealer offers long-lasting, full coverage in a rich, creamy, and velvety texture with pure, skin-soothing ingredients. The high-performance natural formula is infused with Tarte’s pure maracuja oil, which helps to improve skin’s texture, tone, and moisture content while imparting a brightening, dewy, luminous finish. In addition to promoting healthy skin, this velvety concealer is also ideal for masking discoloration and imperfections such as acne, blemishes, redness, scars, hyperpigmentation, and dark circles. This nutrient-rich, blendable, liquid concealer brightens and restores skin’s natural luster, leaving you with a flawless complexion.

What it is formulated WITHOUT:
– Parabens
– Sulfates
– Synthetic Fragrances
– Petrochemicals
– Phthalates
– GMOs
– Triclosan

– The third product in my September beauty favorites is MAC Sheertone Blush in Gingerly. Mac describes the color as a “Capri bronze (Sheertone)” and it costs $21 for .21oz. The color is just gorgeous and it lasts all day!
Mac Gingerly Gingerly
– My fourth September beauty favorite is L’Oreal Telescopic mascara in Carbon Black. If you want false looking lashes without actually wearing falsies, pick this mascara up… It is amazing! You can purchase it almost anywhere and it is a beauty steal with a price tag under $10. I usually purchase mine from Ulta.
Macara
– My fifth September Favorite is Redken Diamond Oil Conditioner. My hair is so shiny, soft, and healthy while using this conditioner. There is no product buildup and you can get a great deal from Ulta when they run their liter sale (usually costs $34, but when on sale, it’s only $19.99). Must buy! My hair has never looked better.
Redken
– And last but not least, my sixth September beauty favorite is BITE Beauty Lush Fruit Lip Gloss in Raisin (pale creamy pink). You can get this highly pigmented lip gloss from Sephora for $22. As a lip gloss fanatic, this is one of my new favorite glosses… Perfect in every way!
BITE Gloss
Sephora Description:
What it is:
A highly pigmented lip gloss featuring healthy fruit ingredients that are delicious enough to eat.What it does:
Like instant nutrition for lips, BITE’s Lush Fruit Lip Gloss contains the same healthy ingredients you’d find in a pure fruit smoothie: real coconut, mango, and strawberry infused with seven nourishing fruit oils. Rich, vibrant, and juicy, this modern formula is highly pigmented. What you see in the container is exactly the color you’ll see on your lips.What it is formulated WITHOUT:
– Parabens
– Sulfates
– Phthalates

– Your beauty addict,

Trisha
XOXO
blog

Flawless Skincare Routine – Simple Steps to a Flawless Face

Hello Gorgeous!

Great skin is smooth, even toned, and dewy. To get those results, you need an effective daily skincare routine in place.

My journey to flawless skin is an evolving process. People ask me often what products I use so I thought I would share my current routine and products with you.

Everyone’s skin type and concerns are different and I know that I probably put a lot of products on my skin (I am a total product junkie), but I am really loving my current results from my nightly routine and I hope you will too.

Nightly Skincare Routine – Simple Steps to a Flawless Face:

Makeup remover

  • To deep clean and improve skin texture and prepare for product absorption, I use Ulta’s Dual Action Cleansing System (I bought this instead of the Clarisonic cleansing system to save some money and I LOVE it–highly recommend it). This little gadget really minimizes pores and helps to improve so many other skin concerns.

ulta-dual-action-cleansing-system

  • You want to use a gentle face wash/cleanser with the cleansing system. You can use any product you like as long as it is gentle (you do not want to use an exfoliating face product with the cleansing system because it will be too harsh when paired together). I am currently using Soap & Glory’s Peaches and Clean 4-in-1 wash off deep cleansing milk.

peachesclean

  • I wash off the extra product from my face by using an extra gentle cleansing sponge (the cleansing system tends to get messy and the face sponge really comes in handy).

Sponge

Now it’s time for the fun stuff… Skincare products! My new favorite line for face care is Kiehl’s!

  • Once my face is squeaky clean, I apply two products together.

First I add Kiehl’s Powerful-Strength Line-Reducing Concentrate to my face

Kiehls-Powerful-Strength-Line-Reducing-Concentrate1

Second, directly after I apply the above concentrate, I apply Kiehl’s Midnight Recovery Concentrate

kiehls-midnight-recovery-con

When I pair these two products together, I achieve amazing results! It feels great on my skin and the next morning my face always looks flawless!

Travel Size StriVectin-SD Eye Concentrate for Wrinkles

And there you have it, my flawless skincare routine. Just stick with it and the results will be well worth the extra five minutes each day.

XOXO

Your beauty addict,

Trisha

August 2013 Birchbox Review

Hello Gorgeous!

Today I received my August 2013 Birchbox and I love it! Take a little peek inside…

#BBFinishingSchool

image

What’s inside my August 2013 Birchbox:

image

5 beauty samples:

image

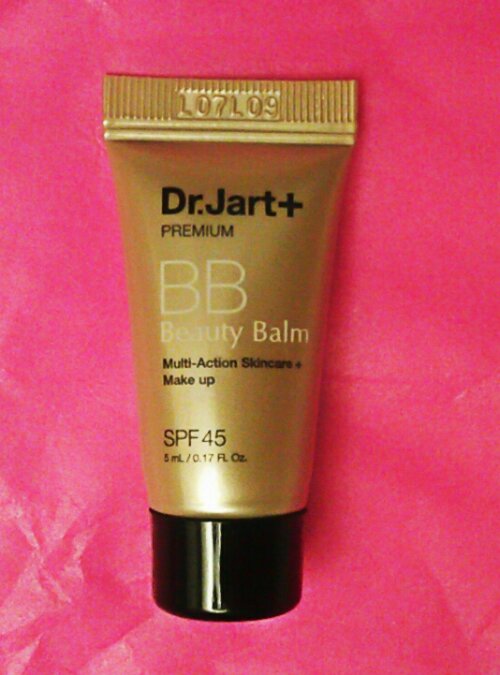
Dr. Jart+ Premium BB Cream SPF 45+

image

It’s a 10 Miracle Leave-in Product

image

Jasmine Seven Fresh Feet Wipes

image

ModelCo Party Proof Lipstick in Kitty

image

TanTowel Classic Formula Self-Tan Towelette

image

I highly recommend Birchbox! Each month their beauty samples never disappoint me and It’s a great way to try out new beauty products each month for only $10.

XO

Your beauty addict,
Trisha

Birchbox June 2013 Review

I LOVE my June Birchbox! Each month I feel as if my beauty box just gets better and better! If you’re looking into beauty sampling programs, I highly recommend Birchbox.

My June Birchbox:

image

A little peek inside:

image

XO
Your beauty addict,

Trisha

Review: Lancome CILS BOOSTER XL Super-Enhancing Mascara Base

Hello Gorgeous!

I was recently introduced to a beauty product I never thought I would buy let alone use and now I don’t want to live without it! It is a lash primer. Specifically, it is Lancôme CILS BOOSTER XL Super-Enhancing Mascara Base that I received as a free gift from Sephora as my Beauty Insider free deluxe sample. This little tube is AMAZING! The main reason why I never considered a mascara base or primer before is because my lashes are pretty healthy and very long on their own, but this product made a HUGE difference. First, it gently separates each lash, coating them with a thin layer of primer, prepping each lash for mascara. Once I applied my mascara, I instantly noticed it was easier to apply as it just glided on without clumping. The final result: my lashes were longer, fuller, and less clumped together. I also noticed it was much easier to curl my lashes and the curl lasted much longer. Throughout the day, my mascara and lashes stayed in place and looked flawless (they didn’t flake at all). And lastly, the primer seemed to protect and condition my lashes as they seem healthier than ever before when removing and reapplying my mascara. Lancôme states in their description that “This innovative mascara base maximizes the result of any Lancôme mascara”. And while this is true, it also maximizes the result of any mascara. I used my favorite inexpensive mascara and achieved perfect results (CLICK HERE to read my review on my favorite inexpensive mascara). I cannot express how much I adore this product. Just like a face primer, this mascara primer provides a perfect application and the results are flawless. This product is definitely worth the extra step in your beauty routine.

Quick Tip: I found that applying the primer and following it immediately with my mascara works best.

Lash Primer

DESCRIPTION:

Give your lashes an XL boost. This innovative mascara base maximizes the result of any Lancôme mascara. Features microfibers for enhanced effect; triangular brush helps separate lashes.

Super-Enhancing Mascara Base.

WHERE TO BUY:

Sephora

PRICE: $24

FINAL RESULT:

Lancôme CILS BOOSTER XL Super-Enhancing Mascara Base really enhances lashes. If you already have dry, broken, thin or unhealthy lashes, you should definitely give this mascara base a try as the results are just amazing. It does exactly what the description says and successfully separates the lashes and adds tremendous volume. If you want beautiful lashes, this is definitely the product to use! I highly recommend it. Think of it as anti-aging for your lashes!

XO

Your beauty addict,

Trisha

OPI Pink Friday Nail Polish Review

Hello Gorgeous!

I thought I would do a quick review on OPI Pink Friday nail polish for you since I am a sucker for pink polish.

Pink Friday is from the OPI Nikki Minaj Collection and the color is a bubblegum pink creme. Normally, I wear lighter shades of pink polish and this one is a medium pink color, but I still think it is a fun color for summer and I always receive compliments when I wear this polish as the color seems to stand out a bit more than others. I was surprised at the formula as it is on the thick side, but very easy to apply and you only need two coats to get the perfect application on natural nails. I didn’t have any problems with the polish streaking either. It also lasted longer without chipping compared to other OPI polishes which is great!

Pink Friday NailsPink Friday

Overall, if you like medium pink nail polish, you will love Pink Friday. It is easy to apply, leaving behind no streaks, and it doesn’t seem to chip easily on natural nails. It is a true Barbie Pink color and perfect for summer.

Where to buy: Ulta Stores or Amazon

Price: $9

XO

Your beauty addict,

Trisha

Dermaplaning and Glycolic Acid Peel to Reveal Younger Looking Skin

Hello Gorgeous!

Recently I pampered myself and went to my favorite medical spa to get a Glycolic Acid Peel (my favorite medical facial). During my consultation with one of the spa’s licensed aesthetician’s, I was introduced to something I had never heard about before called Dermaplaning. I immediately thought this had to do with Microdermabrasion, but it is a completely different treatment so I was instantly intrigued to learn more.

What I learned: Dermaplaning is a non-traumatic method of skin rejuvenation, a “manual exfoliation” performed using a scalpel (yes, a real surgical blade is used) on the skin and is sometimes referred to as skin blading because you’re essentially blading the skin’s top layers, fine facial hair (peach fuzz), and skin imperfections. This treatment also stimulates new skin development. Dermaplaning removes the out-most layers of dead skin cells leaving the skin immediately smooth, supple, and vibrant. Dermaplaning (or skin blading) is generally most effective right before a facial because it helps to enhance the absorption of chemical peels and treatments. Sounds a little scary, doesn’t it?! This process is painless and very safe. There is no down time associated with this treatment. Dermaplaning can be done as often as every two weeks, although it is usually done when fine facial hair starts to grow back, which is generally in one month’s time. And NO, despite popular belief, the hair does NOT grow back thicker! Usually, you can see a difference in the skin after the first treatment (I did) and all skin types can benefit from Dermaplaning.

scalpel

My treatment experience at the medical spa (what to expect): After the licensed aesthetician finished Dermaplaning my face (which only took about 10-15 minutes and my face felt amazing afterwards), she prepped my face for a facial. She used 30% medical grade glycolic acid and left the peel on for 2 minutes (if I wouldn’t have done the Dermaplaning, the peel would be left on for 3 minutes). This facial peel is not painful, but you will experience a mild degree of tingling or a slightly itchy sensation. Usually the aesthetician will fan your face to help with the sensation you may experience, but upon neutralizing the peel, the skin feels fresh and smooth without discomfort. After my facial she used my favorite face lotion Nia24 to complete my treatment (to learn more about Nia24 CLICK HERE and read my full review). My face felt and looked flawless after Dermaplaning and the Glycolic peel (better than it did when just getting a Glycolic peel done on its own).

Benefits of a medical facial peel: Now you may be wondering what the benefits are from a Glycolic peel. Medical spa facials are used to improve a wide variety of skin conditions that include fine lines and wrinkles, uneven pigmentation, sun-damaged skin, freckling, age spots, scaring, and help eliminate blackheads. Treatments stimulate production of collagen and improve the elasticity of skin resulting in smooth, supple and vibrant skin for a youthful and radiant glow. Medical peels also improve the tone, texture, smoothness and appearance of skin. This medical peel on a periodic basis helps to maintain skin health and appearance.

What to expect AFTER a chemical peel: It is important to remember that everyone’s skin is different and will react differently to chemical peels. After a chemical peel, the skin will look a little sunburned. Depending on the strength of the peel and skin sensitivity, redness may fade within hours or last up to a week. Skin may lightly peel (microscopic peeling) over the next 1 to 14 days and new skin will appear. Your skin may feel dry and flake a bit. There isn’t any downtime needed with glycolic acid peels, so you can still go to work or out to a social event shortly after the peel. The small amount of side effects of the peel can usually be covered up with makeup. After a glycolic acid peel, you might not see the expected results immediately. This doesn’t mean the peel didn’t work! It simply takes time for your skin to recover and heal from the peel, so it will take time for your skin to show any improvements. Your skin will usually look better a week after you get the peel. If, however, your skin still doesn’t look any better after a few weeks, you might have to get a stronger peel the next time. It is also very important to keep in mind that sun exposure after a chemical peel can cause unwanted side effects, including hyperpigmentation, so you should stay out of the sun for a least a few days and be sure to use good SPF.

Dermaplaning and a Glycolic medical peel is truly my new favorite combination of treatments. The exfoliation process is fool-proof and overall, I think Dermaplaning the skin is a great way to treat your face before a facial as it really enhances the absorption of peels since it removes the dead skin cells and stimulates the surface of the skin, skin formulations are absorbed more efficiently and results are remarkably improved with this added benefit. And don’t be afraid that the hair will grow in thicker. It won’t. Only flawless skin will be revealed!

Remember that these types of treatments should be done by professionals only. A consultation is essential. Your dermatologist/aesthetician will take in account and discuss complete medical history with you to determine what treatments will be most beneficial. Your medical history can have a tremendous effect on what you see after a chemical peel. After a consultation and a physical exam that includes a close look at your skin, your dermatologist/aesthetician will tell you if a chemical peel will help diminish the signs of aging that concern you and if a chemical peel is right for you.

Your Beauty Addict,

Trisha

Xo

BIRCHBOX Review: Tiny Tweaks, BIG Results

Hello Gorgeous!

Recently I signed up for a few different monthly beauty sampling programs and today I received my first BIRCHBOX from their April 2013 Tiny Tweaks, BIG Results box full of amazing beauty samples. I am definitely impressed and will be keeping my subscription next month for sure.
image
What’s Inside:
image

Caudalie Devine Oil
image
Nexxus Youth Renewal Rejuvenating Elixir
image
StriVectin-SD Eye Concentrate for Wrinkles
image

Youngblood Mineral Cosmetics Anti-Shine Mattifier
image
Weleda Body Lotion
image
One-Year Subscription to Women’s Health Magazine FREE (this is a special bonus just for BIRCHBOX members)
image

I was really excited to see my favorite eye cream from StriVectin inside April’s BIRCHBOX. All the other beauty samples included in this box I have not tried yet and I am super excited about all of them. I will also be signing up for my FREE one-year subscription to Women’s Health Magazine.

Overall, I am really happy with my 1st BIRCHBOX and I definitely recommend this monthly beauty sampling program to anyone who loves trying new beauty products. When I first signed up for BIRCHBOX, I was placed on a waiting list, but soon after, I received an invitation to join and a few weeks later, I received my first beauty box. They even send tracking information when your beauty box ships. I still haven’t received my first Glossybox and I signed up for that beauty sampling program a month before BIRCHBOX!

Price: $10 a month (cancel anytime) and free shipping

Where to subscribe: Click Here

I just love getting a surprise box full of beauty samples each month… It is so much fun! And BIRCHBOX is a great program that is priced to fit any budget.
XO

Your Beauty Addict,

Trisha